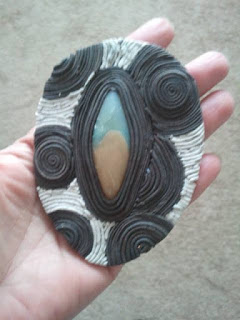
Friday, June 30, 2017

Turquoise today for sure


I promise. I did turn some things around, because as I was making my Kingman turquoise experiments, I stopped and thought: "you know, people probably would like to see first how to do a simple turquoise, without so much talk of 'this turquoise mine this and this turquoise mine that".

Then I started thinking: "what would be the easiest way for someone to actually achieve the look of an average turquoise without getting their hands stained by acrylic paints to the elbows and making a mess all around?"

And the answer came to me. It's so simple you will have a "doh why didn't I think of this before" moment.

I'll post the teaser photo soon. One stone is in the oven, the other ones will get there soon, then as soon as I polish them a little, I'll edit the tutorial and upload it. I DO have to get to Hobby Lobby and Walmart though sometime this afternoon, preferably before the storms start. So I don't promise that it will be uploaded before noon or late afternoon. But that also might depend of my trip to Walmart. I realized last evening that the WiFi signal in the back room where I work and where the desktop is, is not as good as in the rest of the house. So - as I can't move my whole hook-up in the living-room, doh - I am going to pick up an Ethernet cable at Walmart and just hook the desktop to the gateway through wires. To heck with fashion when I need speed.

So update later today.

11:25

How about this for a teaser? This is the piece that I don't think it came up too good.


7 pm

It IS uploading and has been for a while. Except the two interruptions when I lost power because there's a storm system passing through. So... it says 2 hours left so who knows.


Thursday, June 29, 2017

"Clay with me Sunday" live this coming Sunday


I will enable superchat so you can ask questions.


Kingman turquoise tutorial today

Nothing better than when you hit unexpectedly something and you publish a post right after writing just the tile eh?

Anyway.

Working on a Kingman turquoise tutorial. It should show up on youtube probably around 3 pm CDT, considering youtube upload "speed"

I decided on Kingman vs. Royston because Kingman is much easier than Royston. And that before getting people into such a complicated turquoise as Royston maybe a more simple one would be good.

I didn't do a generic turquoise. I might, at a later time.
But I think that if you want to do something that really looks good, you don't go ahead and do just assembly-line type stones. Get in mind what you want to do, as piece of jewelry. Then decide what kind of gemstone you need. Then make the gemstone specific for that piece of jewelry.

Anyway. So I will do today are 4 types (actually 3 with one of them having 2 subtypes) of Kingman turquoise. The high-grade spiderweb, then the waterweb - with silver matrix (pyrite) and with copper matrix, and the more generic Kingman. These are the easiest Kingman types to make.

Here, I'll show you.

generic "boulder" Kingman

waterweb with silver (pyrite) matrix

another waterweb with silver matrix

waterweb with copper matrix

high-grade spiderweb

another generic ("boulder") Kingman

So, I'll update later when the tutorial is done, with the teaser photos, then the link after the tutorial is uploaded.

12:07 update:

The regular Kingman and the spiderweb (I think) came up ok. For the waterweb I need another solution. If I don't figure out how to make a spherical skinner blend, I'll have to go in a different direction of cane. Haha.

3:40 update.

Ok. This is ridiculous. Everybody and their mother HAD to need me today. Phone calls, skype calls, people at the door to check on me - don't get me wrong, I appreciate the care, but seriously? I had restarted the process on the turquoise and got interrupted 4 times, and of course with people who had to visit with me for at least half an hour each, so... yeah, wasted clay, wasted time. I will restart the process.

The only one that came out kind of ok was the "boulder" Kingman. But I'm not happy with it. Too straight lines.


I made real quick some cute DIY earrings, I'll post the tutorial as soon as the varnish dries on them.

how I feel right now


Wednesday, June 28, 2017

No carnelian til Saturday

Ok so, I am very sorry no tutorial yet. Probably not today, it depends how long it will take me now to tape, edit and upload one of the other ones that I have in plan.

What happened? Well, Souffle happened.

I started doing my tests for the carnelian tutorial, and all my tests were coming back opaque. Tried first with Premo then with Pardo. Same.

Then I realized. Souffle. Souffle opacifies the translucent way more than Premo. Who would have thunk it. I don't have the colors I need in Premo. Only in Souffle.

The thing is, I can do the carnelian with just translucent and alcohol inks. But not everybody has alcohol inks. I want to do a carnelian tutorial that people can do by just going to the store and getting 1 package of this color of clay and 1 package of this and ... you get the idea.

As much as I like playing with the new toys, I am trying to have at least half of my tutorials, and especially the more basic ones, keeping in mind that most people don't have a load of money to spend on gimmicks, and especially the beginners did not blow several hundreds to get all kinds of expensive stuff they don't even know how to use. Heck, they might not even know it can be used with polymer clay, huh?

So I'll have to go get new clay for this, Premo clay, but I won't get to the store until Saturday. MAYBE Friday. But that's a maybe.

Wanted to do the malachite then realized that two of the greens I got for malachite are... Souffle, and I have some banding done with translucent, so... it will have to wait til I get Premo too.

So I will be pondering for the next 10 minutes. I'm inclining either for the feather cane or the turquoise.

Watercolor set

I spent all morning finishing a set, taking care of my other websites,  giving the kittehs their topical flea treatment, and cooking. I have to mow the lawn, and this puts into question if I will post a tutorial today or not. It all depends how messed up my hands are after I'm done mowing and if my pain level gets increased.

I guess we'll have to wait and see. The tutorial is about faux carnelian.

I'll update this later. Until then, here's the piece. It's a "watercolor" classic jewelry set, necklace and bracelet. Waiting for the glaze to dry so I can put the clasps on. I used alcohol inks on a subdued "torn paper" effect to get this. And I'm using "old gold" type findings and chain. The chain is actually baked in the clay, I did not use hidden bails or jump rings.


Tuesday, June 27, 2017

Pottery clay effect

So there are a few more things. The two main rules I already explained in the video:

1. Don't try to get too detailed. This effect is designed to imitate the most ordinary pottery clay. You can't get in lots of details with that. That is why porcelain was invented for aristocrats XD

2. Colors. Colors, colors, colors. Don't make something too red, or too blue, or too yellow. Think natural pigments. Natural as in dirt pigments, those are the ones that are readily available to folk people, and those aren't that bright colors. The earthy tones of Sculpey Souffle are just perfect - the only colors that won't work from that range are So 80's Turnip, Guava and Lagoon. And even those, if you add a bit of other colors they're going to be good, like add a touch of grey or yellow (well no yellow on turnip eh)

3. Again colors, but this time we talk finishing colors. They need to be relatively earthy too, the glazes in popular art are also made with dirt pigments and inks, mostly. So choose for the dark part something close to the base color of the clay underneath but several shades darker, and for the "touch-up" on the top of the clay, a few shades lighter. It's that simple. And kind of goop the varnish on it. Not badly goop it, but if it seems thicker on some parts than others, it's ok, it's supposed to imitate the glaze. Also, once again, when you put varnish over texture, go SLOW otherwise you'll get air bubbles.

Well, that's about it. I'm sure people who like to make polymer clay tiles will love this.


Monday, June 26, 2017

Today - skinner blend, fairly extensive

It is uploading, but because it's over 30 minutes it will take another 2:45 hours to be there (at least that's what youtube says) even if it's already at 36%.

Anyway, it's a fairly wide-encompassing tutorial about the skinner blend technique.
You requested it, I'm delivering.

Here's a teaser photo from within the video, until it's up and I post the link


Sunday, June 25, 2017

"Quilted" mokume gane

This is the "Clay with me Sunday" today. I hope you like it. I will probably finish the piece in a couple of hours - just because it needs to bake two more times. I always prefer to just do an extra bake step if there is any chance of messing up a piece by shortcutting a bake. I hope you will like it. It's a little bit on the unusual side when it comes to mokume gane - well, not even sure if you can call it mokume gane to be honest.

Anyway. The event announcement is up. Was up last evening late but by the time it got uploaded I was already narcolepsied on the couch. So I didn't manage to put up the poll cards and review the close captioning til early morning.


As soon as I finish the video for today I will get back to working on the watercolor and on the first paid tutorial.
To announce it, it will be about... raku. What else? I am almost done with the necklace, just have to put it together, all the pieces are done, backs on, varnish where it needs to be, just to put them on their chain and the clasp.And the earrings. It's a necklace and earrings set.

Once I'm done with all that - and in the little break bits I will start the move of the store on facebook. I woke up early enough to take care of the other websites. So the rest of my day can be dedicated to polymer clay.

I am really looking forward to see the pieces that will be posted for the contest. I love seeing peoples' creativity. I will announce here, and on facebook, and on youtube when the contest starts.

I will update later as things happen, as usual.


Saturday, June 24, 2017

Pods

It is uploading.

Sorry I'm posting so late. Been very busy, also went on a short "girls' night out" (well day out) with my BFF. We ransacked Big Lots.

I am almost done with the Raku necklace and the other one. Well I have no idea how to call it. The "Ocean" still needs the jellyfish and corals. And I need to wait for the 1st to get the leather strings and other stuff to finish the African one.

I narcolepsied a little early last evening so...

Btw. Look at these dolls. Look at them. Oh. Em. Gee.
No, I am not going back to dolls. My hands don't allow that. It's one thing to mess up a bead, and another for your hand to twich and destroy what you've worked for a day.

Lutsenko dolls

Here's the teaser until the tutorial uploads. I will upload the "1,000 subscribers" event after that one.


Friday, June 23, 2017

Short video today - more later

As I am nearing 1,000 subscribers on Youtube, I feel the need of an overhaul because I start being a little swamped.

Don't get me wrong, I love making tutorials, and if it wasn't for the slowness of uploading, you'd probably get sometimes even two a day. But I realized I got some areas where I need to streamline the flow, so to speak, because there are hiccups and it stresses me out, and I hate being stressed.

1. I think I will close the online store and start selling on the Facebook page. For two main reasons: probably better market penetration and - most importantly - one less website to update. Right now I have too many places on the internet that I have to go update in order to have a good web presence. Eliminating some would be good. That would mean that

2. I can free the domain and apply it on the blog here. At least this one is directly connected with facebook - well, pretty much. I can install some gimmicks that will make it so that whenever I post something in one of them it will automatically post in the other. The Google+ is already connected here.

3. If I do that, I will be able to "bring in the circle" so to speak, the other ones - flickr, instagram, etc.

4. Yes, I will start to have paid tutorials soon. Everybody does. I will still keep a very decent proportion - probably like 10-15 free ones for every paid one. To be honest, what I've done until now is just... you know, not even appetizers. I'm way far from showing people the "heavy guns" yet.

5. I do need to catch up with my creations. I mean, making tutorials is ok, doing commission work is ok - yes I had to do a few orders, that was another reason why I'm lagging in posting tutorials - but I also need to have more actual good quality pieces out for sale (and show). A lot of the commission work I do I can't show because my clients (that I've had for years) want to be sure of wearing absolutely unique items. I have an understanding with them of never posting photos of what I make for them, so nobody can steal the idea or even get inspiration from it. That means that I do have to work on a few really good quality pieces. I should be done soon with at least a couple.

6. I have a ton of stuff to re-arrange and to pack. Still have a pile on one table since I took photos and never went back to actually pack them nicely so they'd be ready to ship. Also, free that table lol.

So....

I did the stamps for the mokume gane pieces I have in mind. They came up nice. Worth the trip to Target and falling prey to the desire for ice cream lol


The African necklace is coming up nicely. It's on the back burner for now until the leather cords I ordered get here. But yea, that second photo, that is a bead. With ground coffee in it lol


Not sure if the next tutorial I post will be the watercolor torn paper one or the pods one. Funny thing, I had these on the counter, friend comes over, and was extremely puzzled on "what kind of pods are those". She thought they were real. What better compliment?


here's today short tutorial


Thursday, June 22, 2017

Tutorial tomorrow

I'm sorry. No tutorial posted today. I got so caught in making it, then got distracted and started doing something else, and ... well. This is the truth. To my shame.

So what happened was... (I sound like that kid on Judge Judy)... I was getting some scrap through the pasta machine. And what came out of the pasta machine triggered that crazy thing in my mind that started screaming and waving flags and all kinds of bright lights flashing and all that.
I saw only "RAKU RAKU RAKU"

So forgotten was the tutorial. And I started working on that side  job.

I tried real hard to get in pictures all the colors, but it's hard. Mostly because there's not just Pearl Ex mica involved, but a lot of iridescent and interference powders too, and that is so hard to get on a crappy phone. But I tried.


So.

First I got this


I kept kneading and brushing and painting and pasta machining, and folding and... you get the picture.

I got this


Fabulous looking, ain't it?

Now if you think I stopped at this, you don't know me and you're sorely mistaken.

No, I kept going. And going. And going.

And now I sit in front of a sheet of polymer clay with a pattern so beautiful that I can't stop looking at it.
It.
Is.
Raku.

It gives me the same feeling of "this is beauty. there is nothing to be said, all you do is look at it and lose yourself in it. forget about everything else. there is only beauty" as Raku does.

Have you ever made a pattern or texture so pretty that you can't bring yourself to cut it to make anything out of it? You don't want a pendant, a bracelet, nothing, you just want your pretty sheet to look at.

I might make a vase or bowl. This is too pretty to cut into pieces and deserves to sit on my table so I can look at it when I wake  up in the morning and come here and read the news.

It would make the world seem prettier. And the bad things less important.

What did you say?

Oh.

Yes, here it is.


Ocean and earth

I almost named this post "trials and tribulations".

So yesterday I worked quite a bit on the "Caribbean Dream" necklace. Which will end up as "Ocean" or something. Because I think it came up more as an underwater coral reef than a beach. And I need to make a mold for jellyfish. And corals. To finish it.

Anyway, this is how some of the pieces look (it's necklace and earrings)


Now you see why I say I need some jellyfish and corals? lol

So, anyway, as I was cleaning my cane drawer, I decided to mush a few - that obviously I'll never use. While I was joyfully mushing the clay through the pasta machine I got this:


Are you kidding me? I would have worked three days and two nights to get those effects on purpose.

OF COURSE I saved those.

I'm a scrap clay hoarder. There. I came right out and admitted it.

I even used a piece of that long strip that looks like a watercolor landscape to make a mokume gane using the remnants from the necklace sadwiched layers.

It looks like a geological formation.


So.... up in the "I might use this later" folder it went.

Sigh.

Hoarding.

Anyway, finally my "pebble" canes got cured enough so I could use them. I made a wavy delicate bangle. I need to finish sanding it and buffing it and all that. But I like it. I will make a big cane now that I know that my experiment brings in success and make something out of it. A stone jewelry set.

Nah. I got a Stargate in mind. You'll see.


Now this bangle is made up of slices of small canes, but the next cane will be big enough that I won't have to puzzle and quilt and patch. Also it will all be of one kind, these little canes were experiments with color of clay and interstitial color.

Ok getting ready to tape the tutorial. I decided to do a more extensive "watercolor torn paper technique" one. I might have to divide it in two parts as I presume it will be long, as there are all these variations I want to present to you.

When I'm done I need to go get some glue sticks. I have this awesome idea of a glue gun stamp for a type of controlled hidden magic/mokume gane. Yeah!

Will update later, as usual.


Wednesday, June 21, 2017

Tutorial - use your scrap canes for "Hidden magic"

So yes. The story.

I am working on a piece that is (well, will be when it's done) named "Caribbean dreams". On it there's a segment made with the hidden magic technique - I couldn't find a better solution to show - yanno, ocean, algae, lagoon, that kind of thing.
As I was searching in my drawer for some little zipper bags my eyes fell on one of my scrap canes ziploc bags. In it, the only flower cane I've made in the last few months. The pansies one - yes I know that tutorial never came to be. What do you want, I am not very fond of making flowers. Yet.

And as I was looking at it, I realized that it can be used in Hidden magic. That ANY can that has skinner blend/ikat can be used in Hidden magic.

So I made a tutorial.

There ya go.


New piece and still thinking about tutorial

I am sorry but I am not yet decided on today's tutorial. Might be the sculpted feather piece. It depends on how I'm going with the few pieces I'm working on, and i also need to go out and do some grocery shopping.

I managed to upload in the store one of the new pieces. Working on uploading stuff from the last few tutorials.

Anyway, here's the new piece. I'll make a separate post about the new tutorial.

Industrial Era necklace and bangle set


Tuesday, June 20, 2017

New tutorial

The powers that be at youtube say 2 hours 55 minutes. It's 20 minutes long.


I'm working

I'm not sick, I'm not lazy, I'm working, lol

Sorry for the late posting, but I've been up since 5 and busy busy busy. I am trying to catch up with a couple of projects I have - one is almost ready. I will start taping soon a tutorial with making a piece with one of the faux aquamarines. It will be Cherokee beads style.

I finally managed to order the last things I need for making a faux boulder opal. Well, I know Ludmila Bakulina just made one, but you know, I had this in my plans. For a while. So, sorry but I will make it. My order says it should be here in a week, so....

Maybe by then I'll do the faux opal. I mean, regular opal. I know I got so much in plans for the tutorials, but from time to time I do need to work on some of my own stuff. I don't know if you've noticed, but I've only posted one new thing in my store in ages.

So, I'll post later. If I finish the tutorial I'll post at least the teaser if I don't manage to upload it today. And I'll post photos of the finished pieces.

One of them has ground coffee mixed in the clay. Haha. It smells good.


Monday, June 19, 2017

Warning: rant

If  you don't like rants, don't read.

Sometimes I get so irritated of - wait, what? Sometimes? scratch that.
I always get so irritated by attitudes of entitlement. In every aspect of life.

When it comes to polymer clay artists, there are quite a few out there who post tutorials. Some just because they like to share what they know, some because they need to generate income, and posting free tutorials is the best way to attract people to, yanno, buy your paid-for tutorials, sometimes just because they like to have a place where they can feel that they are doing something worthwhile, you know, confidence boost or whatever.
Some of them are more talented, some less, some are good artists but not such good teachers, some are so and so artists but excellent teachers, some actually suck, but that is not the important thing.

The thing is, most people are usually very grateful for being able to have FREE access to knowledge. To learn for free something.

And then you have the entitled douchebags.

There is this polymer clay artist who has a youtube channel. What this woman can do, when it comes to sculpting miniatures, and plants and flowers and bugs, is beyond words. She's an Artist with capital A, and if there was something beyond that, she would deserve it.
She has TONS of free tutorials. And I mean TONS.

Then she posted a presentation (short ad) of one of her PAID classes on a website that hosts this kind of stuff.

Whaddaya know, this guy comments:

"I had to downvote this because it's just an advert for a paysite, sorry. I have enjoyed your normal videos before!"

Did you notice the word "normal"? Yes/No? Notice it. That is what is NORMAL for this douchebag. Someone is spending their time (and money, because obviously materials aren't free, and also, she could earn money during something else instead of making free tutorials) and he considers it "normal". He is ENTITLED to it. He feels that an artist - or anyone else, for that matter - asking to be paid for what they do is a disgrace and something to never be encouraged.

Honestly, if I were her, I'd ban his stinky ass from my channel. Period.

Uhhhh.

In other breaking news, there's about half an hour left and you'll see the aquamarine tut.

The jade.... uhhh. I am so disappointed, I probably shouldn't even have tried to work on anything yesterday. I hate so much the way it came up that I can't even take a proper photo of it lol


Faux aquamarine

Ok, I did the aquamarine tutorial. I will edit it real quick then upload it then I will upload the faux jade one.

Here's the teaser. I wish I had a better camera. My old phone is not exactly the best for close-ups of little things.  link to the video below.


Sunday, June 18, 2017

Sunday - late

Sorry for posting so late. I did finish the faux jade pendant but when I was about half done I got hit by another bout of fatigue/pain. As a result it took me about 4 hours to finish it and when I was done all I wanted to do was lay down. I'm still laying down. I will edit the video and upload tomorrow morning.

I sure hope I don't get another relapse so soon after the last one. I'm so tired of being tired.


Saturday, June 17, 2017

PolyFast review

Well it goes like this.

You know I kept saying that I was going to do a Poly Fast review sometime in the near future.

Well this morning one of my subscribers suggested to attach a piece of felt to the velcro and try and see if I can buff with the PolyFast. And it worked!

 So that got me all excited so instead of anything else I went ahead and did the PolyFast review this morning and bumped the other tutorials a day off.

 In other breaking news, what would you think about once a week a tutorial about making an awesome looking pendant using very simple things and techniques, I mean, besides the needed polymer clay? Huh? Huh? Yeah, I think I might do that.

Today's plan:

 - thrift store (and maybe garage sales) treasure hunting.
- continue making the Lalique inspired thing. I have been experimenting on the central female silhouette. Two things are for sure: 1 I need to use translucent Pardo for the sculpting of it too, not just for the other components. It will be covered in gold mica powder anyway, and that's the only Pardo I have. But definitely Pardo is the only one that can keep the details that I need. and 2. For the first time in a long time I had to use a magnifying glass to do it. I didn't do that since I was sculpting those 1" baby fairies and I needed the magnifying glass to do their toenails and fingernails.
- Maybe start working already on the "Clay with me Sunday" thing. We'll see the response to the poll at the end of the faux jade tutorial.

This is today's tutorial (yes I waited to post this blog entry until it was uploaded)


Ok and a quick DIY tutorial


Friday, June 16, 2017

Today - faux jade

If you hadn't noticed yet, I am trying to alternate the subjects of my tutorials so there will be a little bit for everybody every day.

 So today is one of the promises I made: faux jade.

And it's not just making the jade but also making a piece with it on Sunday in the "Clay with me Sunday" series.

Just as a short explanation if you are not familiar with jade. "Jade" is the common name of actually two different minerals, that have a quite similar appearance: jadeite and nephrite.
They're both metamorphic rocks (that means the original rock, under certain conditions, like pressure and temperature, has suffered modifications at structural level).

Of the two, jadeite is the most precious. Nephrite can only be found in shades of green and one white variant that the Chinese call "mutton fat" while jadeite can be found in many colors and many shades of these colors: green, yellow, red, pink, blue, etc.

The most precious jadeite is the strong green one - of the color that is actually named "jade green".

I did not go for that though because of the danger that is always lurking when working with polymer clay: the danger that your pieces will look like cheap plastic. Sometimes it can happen even with your best intensions. So I tried to avoid that. A few examples of jade - both jadeite and nephrite:

"mutton fat" nephrite from Nepal
nephrite cabochons. notice the variety of greens


Burmese jadeite. One of the types I like to make a faux of


Myanmar lavender jadeite
yellow jadeite
various colors jadeite pieces from Guatemala
imperial jade. Can be more expensive than diamonds.

I will make today a faux nephrite and a faux jadeite. At least that's the idea. Then at the end of the tutorial will be a poll for people to choose which of them they want to see made in a jewelry piece Sunday. 
Nephrite is easier to "faux" than jadeite. In my opinion, of all the jadeite kinds, the only one that is suitable to "faux" in polymer clay without running the risk of looking like cheap plastic is the "mottled" jadeite.

Like this one


Or like the Burmese one on the list. Of course you can play with the hues of green, but the rule is: more translucency, lighter green. Less translucency, darker green. The mottled is actually divided in two kinds: translucent and opaque. On one you can shine a flashlight through, the other you can't, really, you can see there's a light on the other side but it's very diffuse.

The translucency is another reason why you can't really get good quality jadeite in "faux". You can't get that glass-like translucency that the imperial jade has.


Anyway, I'm almost done. Last batch in the oven. Sorry it took so long but I also experimented on something, you'll see.

Will update later with teaser and link to tutorial. I'll try to keep the tutorial under 15 minutes for faster upload. As in, two and a half hours instead of 5-6 hours

Sigh.