"The essence of a polymer clay artist - we'll cover a wooden box with polymer clay and then work hard to make the polymer clay look like wood." ~ Me
Note: if you want to see all contents of this blog please scroll down and click "view web version"
Sorry. It was just taking for ever last evening and I was way too tired so I interrupted the upload and went to bed. I had sleeping issues in the last few days, so I kind of slept since 8 pm last evening til 4 am this morning - with short interruptions.
But after I had coffee, I actually divided the dragon's eye pendant tutorial video in two parts. The first one is almost finished uploading (about 30 minutes? hopefully?) and I'll start uploading the second one right after the first one is done.
As I said in the video, there is a rule in oxidization - I learned this long time ago, in the Fine Arts school in the "antique restoring" class. When it comes to copper and copper alloys:
1. Copper by itself oxidizes blue. Various shades, can go from a turquoise blue to even an almost white blue. The older it is, it might either veer to green, or to grey, then towards black
2. In combination with other metals, like bronze (copper+zinc) or brass (copper with tin) the oxidization will veer more either towards green or towards grey. It all depends on the amount of copper in the alloy, essentially, the more copper, the more blue, the less copper, the more greenish or greyish.
3. The more aged a metal object is, no matter of the composition, the patina in time will get greener, and veer towards a darker green - going even towards black - for objects that are hundreds of years old. That is why it's called "verdigris", essentially Latin root words meaning "green-gray"
Examples:
How new-ish copper patina would look
older copper
even older copper
Sumerian copper coins - the patina is greyish with faint hues of blue or green but veers towards dark grey and black
newer bronze with greenish/bluish patina (more copper in the alloy)
newer bronze with greyish patina (more zinc in the alloy)
we see this all the time - brass with green oxidization
ancient Roman brass coin - patina veering to grey
compare to ancient Sumerian bronze coin
and ancient Roman bronze coins
Now, here's what you can get, a short reference chart
For the most commonly found acrylic paints, Americana
No idea what's up with me posting late on my blog in these past few days.
Anyway, as usual, late in posting but not late in work. I did most of the tutorial for today, just got the back and finishing touches to do after it bakes.
I decided - with Game of thrones season 7 starting soon and all the hype, that I, like a self-respecting die-hard fan of GoT, have to make my small contribution to the hupe, right?
So today I will upload a tutorial on how to make a dragon's eye pendant. No, not my old style ones, a new design. The old style ones already got stolen and people made tutorials about how to make them... lol
Anyway. It's going to take a while for it to bake as it's relatively thick and I want it to be sturdynot fall apart. I can assure you that it's pretty.
This afternoon I will just keep working on my other pieces. Maybe I'll post a pic or two.
Sorry. I am late in updating my blog today. A very busy morning.
Anyway, today's tutorial finished uploading, and it can be found here
I am working on more polymer clay stuff this afternoon. I hope to be able to have another tutorial ready for tomorrow, as I really have to dedicate tomorrow morning to mowing lawns and cleaning the dog run, that means I'll be fairly exhausted after that.
Ok late again to blog this morning. But the same as yesterday I was busy actually making a tutorial. Well, not really a tutorial, as it's the first time I do this. I was looking at some photos a friend had sent me - from a pow-wow - and I went "ha! I wonder if I could do a cuff inspired from those Cherokee loom beaded ones with a controlled Bargello?"
So I did. It's not perfect, with all my calculations, I need one more calculation, when I cut the strips. Well truth be told I need one of those grids like for quilting, but that is so far down the list of priorities that it might not happen this year, lol.
Anyway, it's in the oven. Then I need to do the back and sides. And it all looked so pretteh that I made a pair of earrings too.
Will update later.
Also, the tutorial will be uploaded later in the afternoon. Sorry, but in about an hour or so I am going out, it's Sunday and beautiful and sunny and upper 70s. So just please be patient and enjoy your Memorial Day week-end.
7:00 pm update
I really can't tell you exactly when the video will finish uploading. youtube doesn't say anything about remaining time. But by the snail speed it moves, maybe (and that's a maybe) around midnight?
No I didn't do yet the "whole piece" tutorial. The glaze is not finished.
I did make a new tutorial though. It's uploading, probably at least 2 and a half hours considering it's Saturday and the video is just a smidgeon under 15 minutes. I'll post the teaser photo in a little bit, as soon as it gets cold enough to get out of the oven and get some varnish on
I have to clean some, then do some grocery shopping - and probably will buy a few bricks of PC too.
We are supposed again to have very nasty (a.k.a. tornadic) weather today, waiting for the 9:30 update on that from the best weather man around here.
Will update later, as usual.
Here's the teaser photo. Yes, it's a fancy lightswitch cover:
Ok, tutorial is up
Update 3:20-ish
So most of the stuff is out of the way. I DID get a couple of bricks of souffle black and white, in the hopes of starting to work on the "wonky checkerboard" tutorial. I do need to clean around a little bit, but the main issue is that my hands are killing me. No, it's not the cervical spine issue, it's the bast of thumb osteoarthritis issue. I can barely grasp anything. It started actually yesterday afternoon and it just got worse and worse. The fact that we are expecting those tornadic storms this afternoon (any minute now, actually) is probably the cause. I'll take it easy.
If this whole journey to hell that is cancer treatment taught me, was that you must take it easy, and what you can't do today, just don't do it, you'll try another day. Because if you try and push yourself it will take you anywhere from 3 days to one week to recover and then you REALLY won't be doing a darn thing, lol
So my plans for this week-end and next week will entail:
= a tutorial on how to make a whole piece of jewelry. I realized that the last tutorials only showed techniques but I haven't done a full piece in a while. I think I am going to use some of the pieces of faux larimar to make a "organic concept" jewelry piece. Won't be able to make a tutorial about faux larimar because I am out of blue clay, pretty much. I still have some white Premo but honestly, considering how soft and stretchy white Premo is lately I'd rather wait to buy some souffle after the 1st of the month.
- a tutorial on how to make simple faux patina on metal-like bezels and pieces
- I'm really considering making once a month the "blunder of the month" video. For this May it would be my foot-long pansy cane. haha.
- faux wood - that has to wait until I get more clay
- at one point I will have to "attack" the turquoise, but that one too has to wait for me getting more clay, so after the 1st.
- a video with various small tuts that only take a few minutes each, people who have asked me "how to" and tips and it shouldn't take long. I'd rather make a video with 3-4 of those things together in a 10-ish minutes range than have 2-3 minutes separate videos.
- Touareg inspired jewelry - this might get divided in two, as it implies faux carnelian so it should have a faux carnelian tutorial prior to making the piece of jewelry itself.
- Native American inspired jewelry
- ah yes. the "heat patina". This also has to wait for more clay.
- still got the two to make, the "dimension and distress" and "pansies"
Now of course I can get distracted on other things if my mind decides to wander and feels the sudden urge to try something else. But I'm good on ideas for a while.
Today I have an early morning doctor appointment and I REALLY need to get to the grocery store. So probably I'll start working on the tutorial - whichever of them it is - around noon. That means expect the new tutorial around... 5-6 pm CDT?
Will update later as usual
5:10 pm update
Sorry for late update. I have been working on that necklace (the whole piece of jewelry thing) for the tutorial. It will be a long-ish tutorial so I might separate it in two parts. I'd rather have 2 videos of 25 minutes each than 1 video of 50 minutes. People don't watch that long. But I think it will show a lot of tips and techniques and also the fact that you don't need fancy materials and tools and textures in order to make fancy stuff.
One of my teachers in Fine Arts school used to say:
"to imitate something, one has to see it; to SUCCESSFULLY imitate something, one must study and understand it". He made us one time study a pebble for two weeks.
So, let's take a look at quartz in general and pink quartz in special. Not going to get in the science of it, I linked to some professional websites if you want to find out how it forms and all that.
Let's just focus on the look of it. What do we notice?
1. There are no round lines. Really. The only slightly rounded things we might find are inclusions and "clouds" of other minerals. Otherwise whatever fractures there are in the crystal, they are comprised of straight lines. Jagged lines, maybe, but straight not rounded. Not a single curve. This is not turquoise, malachite, agate or jasper. This is a true crystal.
2. There are no linear, as in thin line inclusions, as is the case with labradorite or rainbow moonstone. There are small crystal agglomerations inclusions, quartz in quartz.
3. No sparklies. That is no sparklies at all, not like opal and fire agate or labradorite.
4. There are fractures in the stone. The more fractures the more opaque the stone. Fracture lines, see point 1.
So in order to imitate a quartz, we need to:
1. make sure there's no blending, and we keep our lines pure and as straight as possible.
2. no worries about making cuts mokume gane style. Also that means no veneering. It's pretty much a block.
3. no worries about adding mica powders, using pearlescents or glitters or foils.
4. see point 1
So to start with we need a clay that has been conditioned but not too conditioned. That will allow us to safely stick together pieces and crumbs but will not have the tendency to blend. Make sure it still cracks when you fold it.
Do not add anything. I honestly tried to see if adding white pastel chalk would enhance the fracture lines but it made the pieces and crumbs not stick and the piece fall apart. And you can't add liquid clay because... well, blending. Definitely do not add any sparklies or glitters. The only times when quartz sparkles is if it has other minerals in inclusions. That is, the other minerals sparkle, not the quartz.
Careful when adding the red. It's exceptionally strong as a pigment. Go poppy seed size and just add the same if it needs be. And as you see in the video it doesn't really loose a lot of color when baking.
I explain during the video how to make the faux quartz.
I do not have a buffer and it's too hard on my hands to buff by hand so I used Judikins Diamond glaze. I finally got the PolyFast for sanding but didn't find a solution yet for buffing. Honestly I don't think I could safely work with an electric buffer, not with the way the nerve damage in my hands make me drop things.
And yes, I do have a lot of semi-precious gemstones in my house. I used to buy and sell a lot of them, raw, tumbled and polished or ready for jewelry setting. And I learned a lot from Native American friends who were/are in the trade and the silversmithing and jewelry making craft.
Just as a teaser, this is a final result. Video will take over 3 hours to upload.....
Good morning. As today is supposed to be a pretty, sunny, low humidity day, I decided that it's a good day to do the pink quartz tutorial.
Mainly because working with translucent polymer clay on a day with high humidity in the air increases the chances of "moonies". "Moonies" are the little bubbles of air trapped in polymer clay, that are the most noticeable in translucent clay. As they are too tiny to pop, it's practically impossible to get rid of them. All you can do is to minimize the conditions that favor their apparition. Usually they are the bane of OOAK doll makers - any OOAK doll maker that knows their business does mix a bit of translucent clay in the flesh one for a more realistic look of the doll, the human skin does have a degree of transparency - hence the risk of "moonies". Nothing like working for 2 hours on a 1/2" doll hand and getting perfect fingers and fingernails (about 1 mm wide lol) and then once you bake it you see moonies and you need to start all over.
Anyway. I got all my clay ready. Will start taping here in a few. Once I'm done taping and editing I will make a separate post explaining what needs to be known when trying to replicate pink quartz. I will post the uploaded tutorial on that new post.
Then the rest of my day will involve lawn mowing, grocery shopping and house cleaning. Sigh. I'd rather be claying lol
I will have to post today's tutorial later in the day.
Busy morning, I woke up at 4, I need to go help my BFF with some personal issues. Will be tied up til around noon, so I won't start on it until maybe 1 pm. So probably you won't see a tutorial uploaded until at least 5 pm CDT - considering youtube's "speedy" uploads. I'll try to make a short one so it wouldn't take that long.
Will update later as usual.
6:40 update. Excellent news, my embossing pens have arrived. So definitely the tutorial for today will be the Tiffany one.
I've also been thinking on a different technique for enameled cloisonne. I'll have to test it first.
Don't forget to enter the giveaway!
Update 2:15 pm. Hardest part of the Tiffany/stained glass tutorial finished. Now just baking them and do the "magic part". Short break while they're baking.
Why don't I edit video while the pieces are baking you ask?
Because i have to turn stuff around and then back again - and I don't feel like it. I will edit once I'm done with everything.
Today is a quite yucky day but, braving the rain, I still managed to snatch a couple of leaves to finally make this tutorial. It actually has two more parts to it - one is on how to make molds of leaves and the other one on how to make patterns with leaves on an object - I'm thinking maybe a light switch cover?
I started the upload of the tutorial. Considering the video is about 15 minutes long, youtube says 2 hours 15 minutes.
I'll update with the link to the video when it's done.
Update: it's up
This is the final product of the "bonus" part. As usual, I'll update more as the day goes by.
12:30 pm update.
About half an hour left on the upload.
And a surprise. I have 98 subscribers on my youtube channel! Considering that I posted the first tutorial 19 days ago, I am really surprise - and feel very blessed - that I already got so many subscribers.
I think this needs celebrating. And I think I will have my first giveaway. Once the tutorial gets uploaded, I will make a short - 2-3 minutes video for the 100 subscribers celebration and giveaway and just have to click "publish" when the 100th subscriber happens. I'm excited.
And I think I have the perfect thing in mind. To choose from one of my "happiness kanji" necklaces or one of the "bargello" necklaces.
I researched quite a bit for the design of this cane. I chose the triangles arranged to formed lozenges because they are a repetitive motif in many cultures, and as symbol it usually represents fertility - not only as babies and breeding, but also as general fertility in life, a kind of "may all be bountiful to you". The symbolism is very simple - and some might find it crude. The triangle with the point down is the female, the triangle with the point up is the male. It's essentially based on ... the shape of the public hair that is different for human males and females. When they come together in a lozenge.. you get the picture. So, yeah, it's been around since the dawn of the human species, and is one of the most generally spread world-wide, it can be found in all ancient cultures, from Australia to Siberia, to Africa and to South America, beyond and in-between.
Now, the colors.
If you want to go for more a more contemporary look, you can choose brighter colors (also specific to modern Mexico). But if you want to go with the traditional, ancient native color palette, you must choose colors that are a subdued. 'earthy" primary: cinnamon red instead or red, stoneware blue instead of blue, sage green and forest green instead of regular bright green, pale yellow instead of bright yellow. And the rule is, you MAY use a brighter blue or green but NEVER together. If you have together green and blue they both must be subdued and earthy. Otherwise you can use a turquoise blue, but then don't add green.
examples (one brighter one not so bright)
As what you can find on the market, I'd recommend the Souffle. It has beautiful earthy colors that don't really need mixing. In fact, I am using the Canary yellow in the tutorial.
If you don't have Souffle and don't feel like going to buy some and just want to use what you have, you'd get the colors as follow - a little approximate as the colors are a little different on different brands. I am talking here of primary colors for the mix - count as "part" any unit of measure; you can get a sheet on the thickest setting then use the same cutter to cut the "parts" out of the sheets:
- subdued yellow - 3 parts white 2 parts yellow
- earthy red - 2 parts red 3 parts yellow 1 part brown (or 1/2 black)
- stoneware blue (or thereabouts) - 3 parts white 1 part blue 1/2 part black.
- sage green - 2 parts white 1 part yellow 1 part green 1/2 part black
- forest green - 3 parts green, 1 part white or yellow, 1/2 to 1 part black
Careful with each color - in different brands the pigments are stronger. So whatever is not white, yellow or green, first add half of what I recommend, look at the result, then if it needs more, go for it.
The cane is huge. I tried making it smaller but I'm losing detail. This way, it's a pain to reduce but it keeps all the design. Careful with the center, it will have the tendency to move slower, like any other big/thick cane. Also try to get all your colors at about the same amount of conditioning otherwise some might "pull" more than others.
Reducing:
ALWAYS start with just pressing. Give one firm press, with an even pressure (you can use an acrylic stamp block if you're comfortable with that better than your hand), just one press, roll once for the next side, one press, roll. Of course, only press on the wrapped in black side. You will be amazed how fast it reduces, within 5 minutes you will have it at about 1". From there it's easy. Start using your roller. But be patient, one roll, turn, one roll, turn, every 8 rolls turn it around - most people have an uneven rolling and if you don't turn it one end will be thinner than the other. It takes about 15-20 minutes to reduce it to about 1/2" side. Just don't get greedy and in a hurry and don't do more than one at a time.
Here's the diagram.
The tutorial should be up at around 7:15 pm CDT - it's 5:40 pm CDT right now and youtube says one hour and 35 minutes remaining. I'll update this with the link when it's up.
P.S. I'm utterly confused. The uploading computer says "29% uploaded, about 1 hour 10 minutes remaining". The laptop says "20% uploaded, about 2 hours 55 minutes remaining". WTF Youtube?!?
The cane is from this necklace. The tutorial is the first one I ever uploaded.
Sorry for the late beginning. Again I didn't sleep well last night so it took me a while to get out of the "i'm a zombie" phase.
I am running out of clay. So the options for tutorials will have to be restricted to whatever colors I still have "in stock". I know, I know, "go buy more" - well that won't happen until the 1st.
I do still have enough for this week's tutorials. I think. Got a request for a separate tutorial for the cane of the Central America native inspired necklace. When I looked - I was out of black. Went and rummaged through the "drawer with treasures" - a.k.a. where any pieces and bit and scrap of clay is hiding - and found an old block of black Premo. I mean OLD. That thing is probably 7 years old. Of course I had left it open after pinching a chunk of a corner so it was dried. I said "no problem, in the food chopper with you" well guess what? My food chopper crapped. So that goes on the list of "must have" for the 1st. I did manage to get that clay conditioned though, with a lot of pasta machine cranking and elbow grease. And of course clay softener.
My lawn needs mowing but looks like some rain is on the way. So I guess it's tutorial time. First the pansies then either the leaves or the cane. I'm sstill working on the "dimension and distress" no worries.
I'm thinking of making one of these two:
They're perfect example of "skinner ikat with inclusions:
Ok I'm off to those pansies. Will update later as usual.
2:00 update. Editing the pansies tutorial. I think I made the biggest cane I've ever made in my life! And I was even able to reduce it! lol
Anyway. Will be working on the leaves tutorial too while the Stormtrooper is working on the video.
5:10 (ish) update
Unfortunately I made some boo-boo so I need to re-tape some of the pansies tutorial. Will be doing that tomorrow.
Until then I made the tutorial with the cane for the Central America native inspired necklace. Will post separately explanations and diagram.
Just kidding.
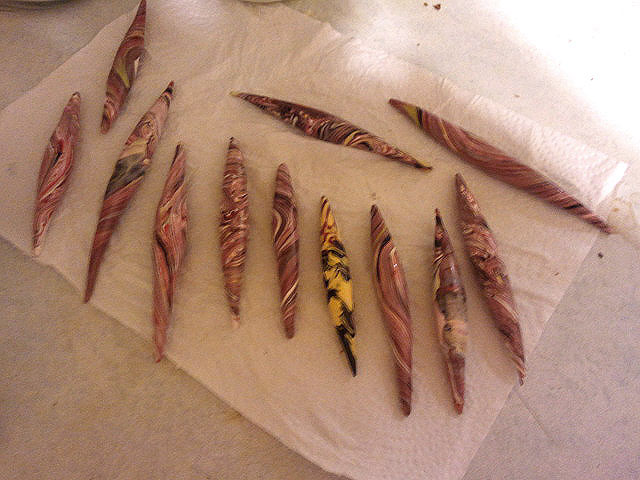
I've been making torpedo beads all late evening. I love the effects I got on some of them.
Now what to do with them lol
Oh yes, and I don't have a bead maker, they're done by hand. I had (imagine that!) some scraps and did some damascus cane and other stuff then used it as veneer for these. If you're interested how to make them without a bead maker, just tell me.
Also I discovered something while making them. I'll have to replicate the effect and if it replicates, I'll make a tutorial about it.
Quite a crop huh
that one in the middle
looks like some kind of egg ready to hatch or something
So change of plans. I realized that the "dimension and distress" tutorial is actually going to be a little larger so I'm still working on that.
In the meantime, I made a short tutorial on how to make a controlled ikat cane in a much simpler way than the tutorials out there show you - that is, using a checkerboard cane.
After I futzed around with the idea (and some clay) on making a tutorial about making pattern canes using the ikat cane, I realized that that's the subject of a bigger tutorial as well.
So I just went ahead and did the small ikat cane one.
I will make later ones on patterns and also how to use the ikat on making realistic flowers.
I'll update later, also will update with the link to the tutorial as soon as it's finished uploading.
About 40 more minutes. Did you think youtube was going to be kind to me?
tutorial is up:
I am taking a break as I need to go out with my BFF and her mother, who is visiting from Virginia. You all have a good Sunday now, hear?
Yes, yes, I know, I've been talking about the "dimension and distress" tutorial.
But, considering that it's chilly and the barometer still holds in areas that are uncomfortable for me so I'm still in quite a deal of pain, I might actually work on two tutorials today. I don't promise I'll post both of them today though.
I've been watching a number of tutorials on how to make hollow beads. And I think I can add my two cents to that, just a bit of knowledge that I got through experimentation and experience. Who knows, maybe some of you might enjoy it. How does "hollow pod with seed inside" sound?
Ok I'll start working on the "dimensions and distress" tutorial now. Probably show the technique on a couple tiles, a bead or two and a pendant.
Will update later during the day as usual.
12:10 (ish) update
Oh well. I did the hollow beads tutorial first. Just because the other one takes a while. You know me, I must have pieces already done, then pieces that are half done, before I start the tutorial. That, and the editing takes the longest.
OTOH, 1 hour 8 minutes upload duration for a little bit over 7 minutes video. I am seriously going to look for some solutions for that today. I found a couple open source converters and recorders that are special for streaming and live recording with optimization for the web. I guess we'll have to wait and see how they work. The Stormtrooper can take whatever I throw at it.
So, I survived yesterday, and except for a lot of leaves on the ground and one temporarily scared out of his wits cat, it wasn't so bad.
Today is round two. True, we are not in "high risk", not even in "moderate", just in "enhanced". But this is Oklahoma. For one, we've had tornadoes before even when we were in "slight" risk and for two, Oklahoma City is smack dab in the bull's eye of the area of "enhanced" risk.
So, I guess we'll just have to wait and see.
The only issue is that due to the atmospheric pressure my chronic pain is more of an "acute chronic pain". Well. I'll survive that too.
I've been mulling lots of ideas in my mind last evening, for new jewelry pieces and other kind of stuff, and also for tutorials.
I am glad you enjoyed the Coleus leaf cane tutorial Yes, the same principle can be applied for other purposes and yes, the final part looks a little bit like making Natasha beads.
I think I'll do a tutorial on applying different color layers of mica powders and chalk pastels on the same area for dimensional or distress effect today. It's plain, simple and shouldn't be too long.
No, I did not forget about the faux Tiffany tutorial. I still didn't get what I need. I will, soon, I promise.
In the meantime I am researching the differences between rubbing alcohol, surgical spirit and denatured alcohol and the effects it would have in alcohol ink blooming and in the actual DIY alcohol ink. I still have lots of markers around the house haha.
What do you guys know about Patreon? Tell me.
And now that we're on the subject of "tell me", I appreciate all your messages. Yes, I will do a "meet me" video to answer all your questions. Soon. I promise.
Will update later as the day - and the storms - pass by. In the meantime, my lilies have bloomed, last night, during the storm
9:45 update
I decided to make a tutorial on faux enameled cloisonne. I just felt like it. Making a pendant so it will be done to show it at the end. The tutorial should be fairly short afterwards.
Maybe if I'm hyper enough because of the weather and if I don't lose power I'll make the "dimension and distress" one too. I am so optimistic.
In other news, OKC is not in the "enhanced risk" anymore, just in the "slight risk"
Update 1:40 pm. Meh. Everything got pushed by a few hours. Internet people fixing the interwebs in the neighborhood due to storms yesterday.
Update 4:55 pm
It is uploading. About one hour and a half left - as of now. Until then, here's a sneak peek - the image is a little blurry as it's a still from the video. The glaze isn't fully cured yet, it will be completely transparent like glass when it will be fully cured.
Update 6:25(ish)
Storms rolling through
40 more minutes on the video
I really need to get some surgical spirit and see the difference in blooming on polymer clay for alcohol inks vs IPA.
Piece finished curing, this is how it looks like
And no, this technique cannot be used for faux stained glass. For several reasons among which the most important is that stained glass is not glossy. You are supposed to avoid glossiness and glare as much as possible so the actual design and pattern aren't hidden by it. Stained glass has a mated finish.
That's why I say, be patient. I will do the faux Tiffany tutorial and you will see that I'm right. THAT is the look.
The Norman Weather Service has upgraded the severe weather risk area to "high". That's the highest. There is a severe tornado outbreak predicted for today. As much as it is true that my side of town is still in the "slight", that doesn't mean it can't get hit. Weather is unpredictable and mother nature doesn't really care about lines people draw on a map.
This being said, I might be updating a lot. I tend to be hyper when I'm worried.
Back to polymer claying.
I found a way to do the home-made alcohol inks. FINALLY. That's one of my pet peeves, that with my income I can't afford so many of the goodies out t here that would allow me to make prettier jewelry. Oh well. With careful budgeting I'll get there. One day.
And as I don't think I'll ever make a tutorial video about it - i t would be too risky with my hands medical issues, I'd probably topple stuff left and right and can't do that in the office room, I did the inks in the kitchen and there's no way to rig the camera there anymore - I'll just tell you.
Get a few smallish jars or if you're sure that you won't bump and topple, even plastic one-ise cups. Alcohol (the higher grade the better). Those fine tip applicator henna bottles work the best for storing (I just had a whole bunch in the house as I do henna tattooing from time to time). And..... *suspense building*..... permanent markers. Well. Should have thought of this earlier, the permanent markers DO give that strong odor of alcohol when used, right? So, wearing gloves (a must, otherwise you'll stain your skin something fierce), break the markers open, remove and unfold the felt-y thing inside, and let it soak for 5-6 hours in alcohol. And voila! you got your alcohol ink. You can get the markers at the dollar store for quite cheap. I had around the house a few sets of many many colors so I am still in the process of making many, many colors of ink. Why did I have so many? No idea. I don't remember buying them - I don't do marker art and drawing - so probably someone got it for me.
As I can't get any stuff until the first of the month, and for the faux Tiffany I need either more liquid polymer clay or an embossing ink pen, I was thinking to do a tutorial today on canes for Coleus leaves. Even if you don't know what Coleus is, you've seen it for sure. It's an annual decorative plant, with the leaves prettier than most flowers. There are many kinds, each of them with a different design on the leaves. Here's a few:
Yes, there is a way to replicate those beautiful patterns. And there are dozens and dozens of them. Even without using it as a leaf, you can still use it for a pendant or beads.
So yes I will get on that today.
Will update later
Update 2:55 pm.
Storms have started to fire up in the southwest of the state and are already becoming tornadic. Uhhh
I finished the coleus tutorial, it's uploading. 2+hours for about 16 minutes of video. Seriously, youtube?
Result
Trying to find my syringe needles. I saw something really cool involving alcohol inks and I want to try it but I need a very controlled and tiny dripping. It's a huge difference working with an A4 sized yupo paper and working with a 1square inch of surface.
Yes I have syringe needles. You can find them at feed stores, the kind that have stuff for cattle. Syringes too. That's what I always used when rescuing kittens. The syringes, without needles, doh.
Update 5:50
Yes the tutorial got uploaded but I didn't have the time to update this as a first wave of severe storms passed overhead. Just a slight stuff for what has been around the state today - got some quarter size hail and lots of wind and rain. My poor shorthair cat is terrified of storms. He starts yowling loudly and if I don't go pick him up and cuddle him he gets in a kind of shock state and pees himself while screaming in terror. Well he might still pee himself if I don't get to him in time.
Yes. Not much polymer claying today, besides the cane. Sorry, bad weather.
I woke up a little after 2 am. Storms moving through. Very noisily. At least on my side of town there was no wind damage. Well, at my house. I didn't get out of the house today so I don't know about others, but the West and North sides of OKC had wind damage.
So I told myself "I'll take naps during the day". Well, I will. So there.
Until then though, I finished the "make a dragonfly necklace out of your scrap clay" tutorial. It's uploading now. But it's 42 minutes long. So... 4 hours, maybe?
Anyway. It looks good. I'll take a nap and then I'll work on the other one I have in mind. I intended to go get something but I decided it can wait. Until the week-end.
This is how the necklace came out:
Edit 12:15 pm
Youtube is sneaky. Now it doesn't say anymore how much time remaining for your video to upload. It only says the %. Because of course you might forget that you started the upload an hour ago and it's only gone to 20%. "Four hours? Us? Naaaaa! Here, look at this %! See how good we're doing?"
Edit 7 pm. It's finally up. I realized I did a little mess up and the eye cane section was repeating, I fixed it but it takes a while for youtube to process that (in case you were wondering)
Anyway, here it is
Edit 4:45 pm. It started showing time remaining. 2 more hours. I think I really need to divide any videos into 10-15 minutes at the most and just upload "part 1" "part 2" etc. This is ridiculous. Again it's youtube not me. It does seem to go faster at night, but I'm sorry, I am not going to leave the Starship trooper on for the night. Not so much about power consumption but about noisiness.
Oklahoma. We're supposed to have a wave of severe weather starting this afternoon til Friday, with a short break part of the day on Wednesday.
All my scars started screaming last evening, so of course I didn't sleep too good. Woke up the first time close to 2 am. Moved to the living room, turned on the youtube on reality tv courts and managed to sleep til a little after 4 am. Yes, for some reason, white noise that comprises either Judge Judy or Judge Milian help me sleep better than "binaural music for relaxation and sleep" lol. Oh no, don't think that I consider them boring, in fact, I love both of them to pieces. When it comes to Judge Judy, she is my ideal figure of a mother. And did you ever notice how much her and Sophia's character in the Golden Girls are alike? As for judge Milian I love her to pieces. No, no girl crush, I'm 1000% hetero lol. I just like her a lot, she has a great heart but
Wait this is a blog about polymer clay. Why am I rambling about TV shows? Haha
So after straightening the house a little I am planning on making a tutorial about faux Tiffany stained glass effect. I searched and searched and couldn't find anywhere a tutorial with the technique I personally use, so hey! I might call it Kalyana technique eh? My name (well my brand name) will be famous for eternity! "Day's technique" wouldn't sound as awesome as "the Kalyana technique". Oh yes. Sounds impressive and mysterious.
Anyway. I'll update this as the day goes by, as usual. I know, blogs shouldn't be done like this. Who cares. This is my blog and I write what I want and when I want it.
Oh yes, the rant. So a couple of weeks ago I purchased some stuff on Ebay. Among which were some texture sheets from China. They started coming in the mail, various vendors, not just one source. And one of them really pissed me off, to the point that I left a scathing feedback review.
See this (click on the link, it's ebay)? Does it say "silicone"? Does it say "baking"? Yes? You see it?
well, it's darn plastic. Has nothing to do with silicone or with baking. It melts. It doesn't bend.
Don't get me wrong, the texture is still ok, does leave the imprint I wanted it to - the bubbles one actually adds a lot of texture to mokume gane. But I hate it when vendors misrepresent their merchandise.
Also, as idea. Next time when you go treasure hunting at a second hand store, look in the kid's toys area. Some of the play-doh kits have really need cutters and stamps and molds. Actually some of them are even worth to buy new. You get many awesome shapes of pendants for the price that it would cost you to buy a single one from a polymer clay supplies store.
Talking of which. I hate that there is no more Michaels in my neighborhood. There's only Hobby Lobby and I absolutely loathe their overpricing. I was looking, those 5 piece kits of silicone-tipped sculpting tools? You can get them usually under $5.50 on ebay, amazon, etc. They're close to $12.00 at Hobby Lobby! Then, cutter sets - same exact shape, same exact dimension, same exact number of cutters, in the cake decorating area (fondant) it's $2.99 or $3.99, in the polymer clay area it's $7.99. Yes, the package is different but it's the exact same thing!!!
Anyway. Talk to you guys later.
11:50 edit
Look at this
Dude. We should get a swap going.
Edit 3:50. Watching the storms starting to fire up in the Texas and Oklahoma panhandles. The nasty kind of storms. The ones that hate each other and are each by its own. Seriously, from the so many CEUs (I completely forgot how many) I got in classes and working in State Emergency Management one thing I learned early on: line of storms is less dangerous than isolated strong storms. That's not to say that lines of storms - yanno, like the ones that stretch from Arizona/SW Texas all the way to Delaware in a diagonal - don't produce tornadoes. Yes, they do, but if it's a line of storms the chances of those tornadoes to be F5 are very low. F4, maybe, with a capital M. F0-F1-F2-F3. Not that those don't cause damage, but they don't kill as many people and don't do so much destruction. But the big, isolated storms that move kind of together but not really - like a group of crochety old ladies at church, they kind of want the pastor to see they're good people and care about the others but at the same time they can't stand each other. THOSE are the kind that can produce something like the 2013 El Reno tornado, the widest in recorded history, 2.5 miles diameter at the base of the funnel. Or the infamous Moore 2009 and Moore 2013, both suspected of almost passing the F5 level, that killed so many people.
Bah. Anyway. I keep experimenting for the faux Tiffany tutorial. It's possible that I might have to do it later. I'm almost completely out of liquid Sculpey and the glaze dries out before I can finish the ouline to sprinkle it with the embossing powder. Plus, I can't do such pretty lines with the paintbrush as I can with my henna tippity-tip squeeze bottle. Yea, that's the one that rocks.
See? Not that awesome, The one with the glittery embossing powder at the left (which is the finest one) looks a little better, but the lines are still too thick. That's because I had to keep going back over with the glaze because it kept drying before I could apply the powder. Looks like a child's drawing. Yes, yes, I know, Tiffany lamps aren't exactly the sharpest lines in the drawer but still this looks like a second grader drew them.