"The essence of a polymer clay artist - we'll cover a wooden box with polymer clay and then work hard to make the polymer clay look like wood." ~ Me Note: if you want to see all contents of this blog please scroll down and click "view web version"
Thursday, August 31, 2017
Canes 3 and 4, and trim for patchwork bracelet
Here are the tutorials for the next two canes as well as for the trim between patches. Remember these are supposed to look like quilt fabric:
Cane no. 3
Clay colors: Premo ultramarine blue, black and white.
Mix the ultramarine blue with black in a 2:1 proportion - calculate with the clay ran through the thickest setting, using the 1 1/2" cutter to cut the parts
This is to obtain a blue that is more subdued and is a color commonly found in quilt fabrics. It should look like this:
Make a plug out of the blue you got
Wrap it in white ran through on the thickest setting:
It should look like this:
Reduce it to about 1/4" (6 mm)
You should have a total of about 13".
Cut a 9" piece and put the remaining piece aside
Of the " piece, cut 1" and put to the side
Using your roller, slightly flatten the remaining 8" piece
It should look like this:
Cut the 8" piece in 1" segments
The first 1" that you have cut, that is still round, wrap it in blue on the thinnest setting
It should look like this:
Run the blue through the thinnest setting, then cut strips 1" long 1/4" wide
Start stacking the flattened pieces alternating with the blue strips
It should look like this:
This is how the stack should look like. Advice: stack them laying flat on your tile/work surface, It's easier than trying to stack them upwards
Wrap around the rounded wrapped 1" piece
It should look like this. Don't worry if it's not perfect looking
Wrap the flower thus obtained in a sheet of blue on the thinnest setting
Make another plug of the blue
Reduce it to the length of the flower cane
Cut it in quarters, lengthwise
work the quarters into triangles
Arrange the triangles in four corners of the flower cane, so they'd "squarify" the cane
Using your fingers, flatten the cane even more into a square shape
Reduce the second piece of the blue wrapped in white that you have put aside in the beginning, so as to obtain 8 x times the length of the flower cane
Flatten the string
Cut the string in 8 segments the length of the flower cane. If you rung out of string, just make some more
Place pieces of the string where the triangles at the corners end, so as to cover whatever indentation might still remain there
Gather all your remaining scraps and mix them. When thoroughly mixed, run through the pasta machine on the thinnest setting
Wrap the cane in it
It should look like this
Now reduce it to 4"
Cut in 4 x 1" segments
stack the segments together. Then reduce again. Make sure you press from the center to the edges, to eliminate any air bubbles
Reduce again to 4". Cut in 4 x 1" segments and stack again
This is the final cane. Tiny delicate flowers like in a quilt fabric
CANE 4
Get all the remnants from the previous cane, some green and some black. If the green is bright (like I have it here) add a bit more black, if it's darker, add less. We are aiming for a subdued green a tad darker than the Premo Jungle Green
Condition white clay to be the same as your green mix
Cut about 1/3 of each the green and the white and set aside
Of the 2/3 of each color, run through the machine on the thickest setting and get 2 squares cut using the 1 1/2" cutter
Cut once, then run again through the machine until you can cut a second square of each color
Like this
You need two squares of each color. The rest put aside on top of the 1/3 of each color you already have there
Stack the squares you have cut alternating the white and the green, taking great care to align the edges properly
Using your roller start flattening, going both directions, and turning over the clay from time to time so no side would get more flattened than the other
Flatten until you get a square slightly larger than a 2" per side. Trim it to 2"
Cut it in 4 equal pieces
Stack the pieces, paying attention to the alternating colors
Cut the stack in two equal pieces, crosswise on the stripes
Very carefully, cut each piece in two, on a diagonal
Now turn around one triangle of each pair, and stick it on the other side of the other triangle, with care to align the stripes properly, to form a lozenge
Now stack the lozenges together making sure you got the alternating color at the junction, not green on green or white on white
Cut the edge triangles so you will be left with a rectangle. Then cut the rectangle in two, crosswise on the stripes. Now you have two shorter rectangles
Put the rectangles together making sure that you align the stripes properly
Cut that rectangle in two, to obtain two smaller rectangles
Reduce those rectangles with care to obtain 2 cubes with the side of 1/2"
Now with the green and the white, stack clay until you get 2 cubes of one color each, also 1/2" in dimension
Arrange the 4 cubes like this
Reduce until you get a 4" long cane
Cut in 4 x 1" segments
Stack the segments so they form the tartan pattern. It's ok if it's not perfect
Now reduce again to 4"
Cut again in 4 x 1" segments and stack. This is the final cane.
Trim between the patches:
Get the remnants from the hearts cane and mix well. Then run a sheet of thickest setting
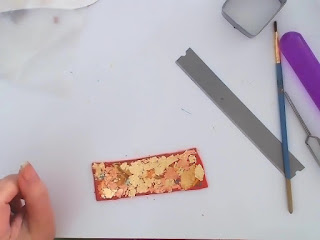
Cover with various color foil flakes. If you don't have more than one color, it's ok to use only one. If you have no gold or silver or copper foil at all, then use a metallic acrylic paint to cover the surface entirely. Wait until the paint is thoroughly dry
Cover with a sheet of translucent clay on the thinnest setting
Run through the pasta machine on succesively thinner settings, starting with the thickest, in the same direction, until you get to the thinnest.
And this is it. On to the tutorial~
Subscribe to:
Posts (Atom)


